I've wanted a PCB for the button box for a long time, so I started trying to make one last week. However, I can't make silicone button contacts, and can't really find any cheap way to get buttons with LEDs inside them other than what I'm doing, so I kind of have to stick to the same button design: 3D printed plastic with aluminum tape on the back which makes contact with wires on a board.
Thus, the whole top side of the board slowly gets covered in powdered aluminum over time and so I can't really have any traces there. Even so, I tried using my double-sided material, but that exposed a few problems: First, carving the top side was a large amount of machine time all for a surface whose goal was to be completely unused, and there was still a lot of copper there to get shorted together by the powdered aluminum despite all of the small cuts to separate it. Second, a lot of those cuts failed to actually separate the copper, which lead to that stabilizing platform shown in the post from a few days ago.
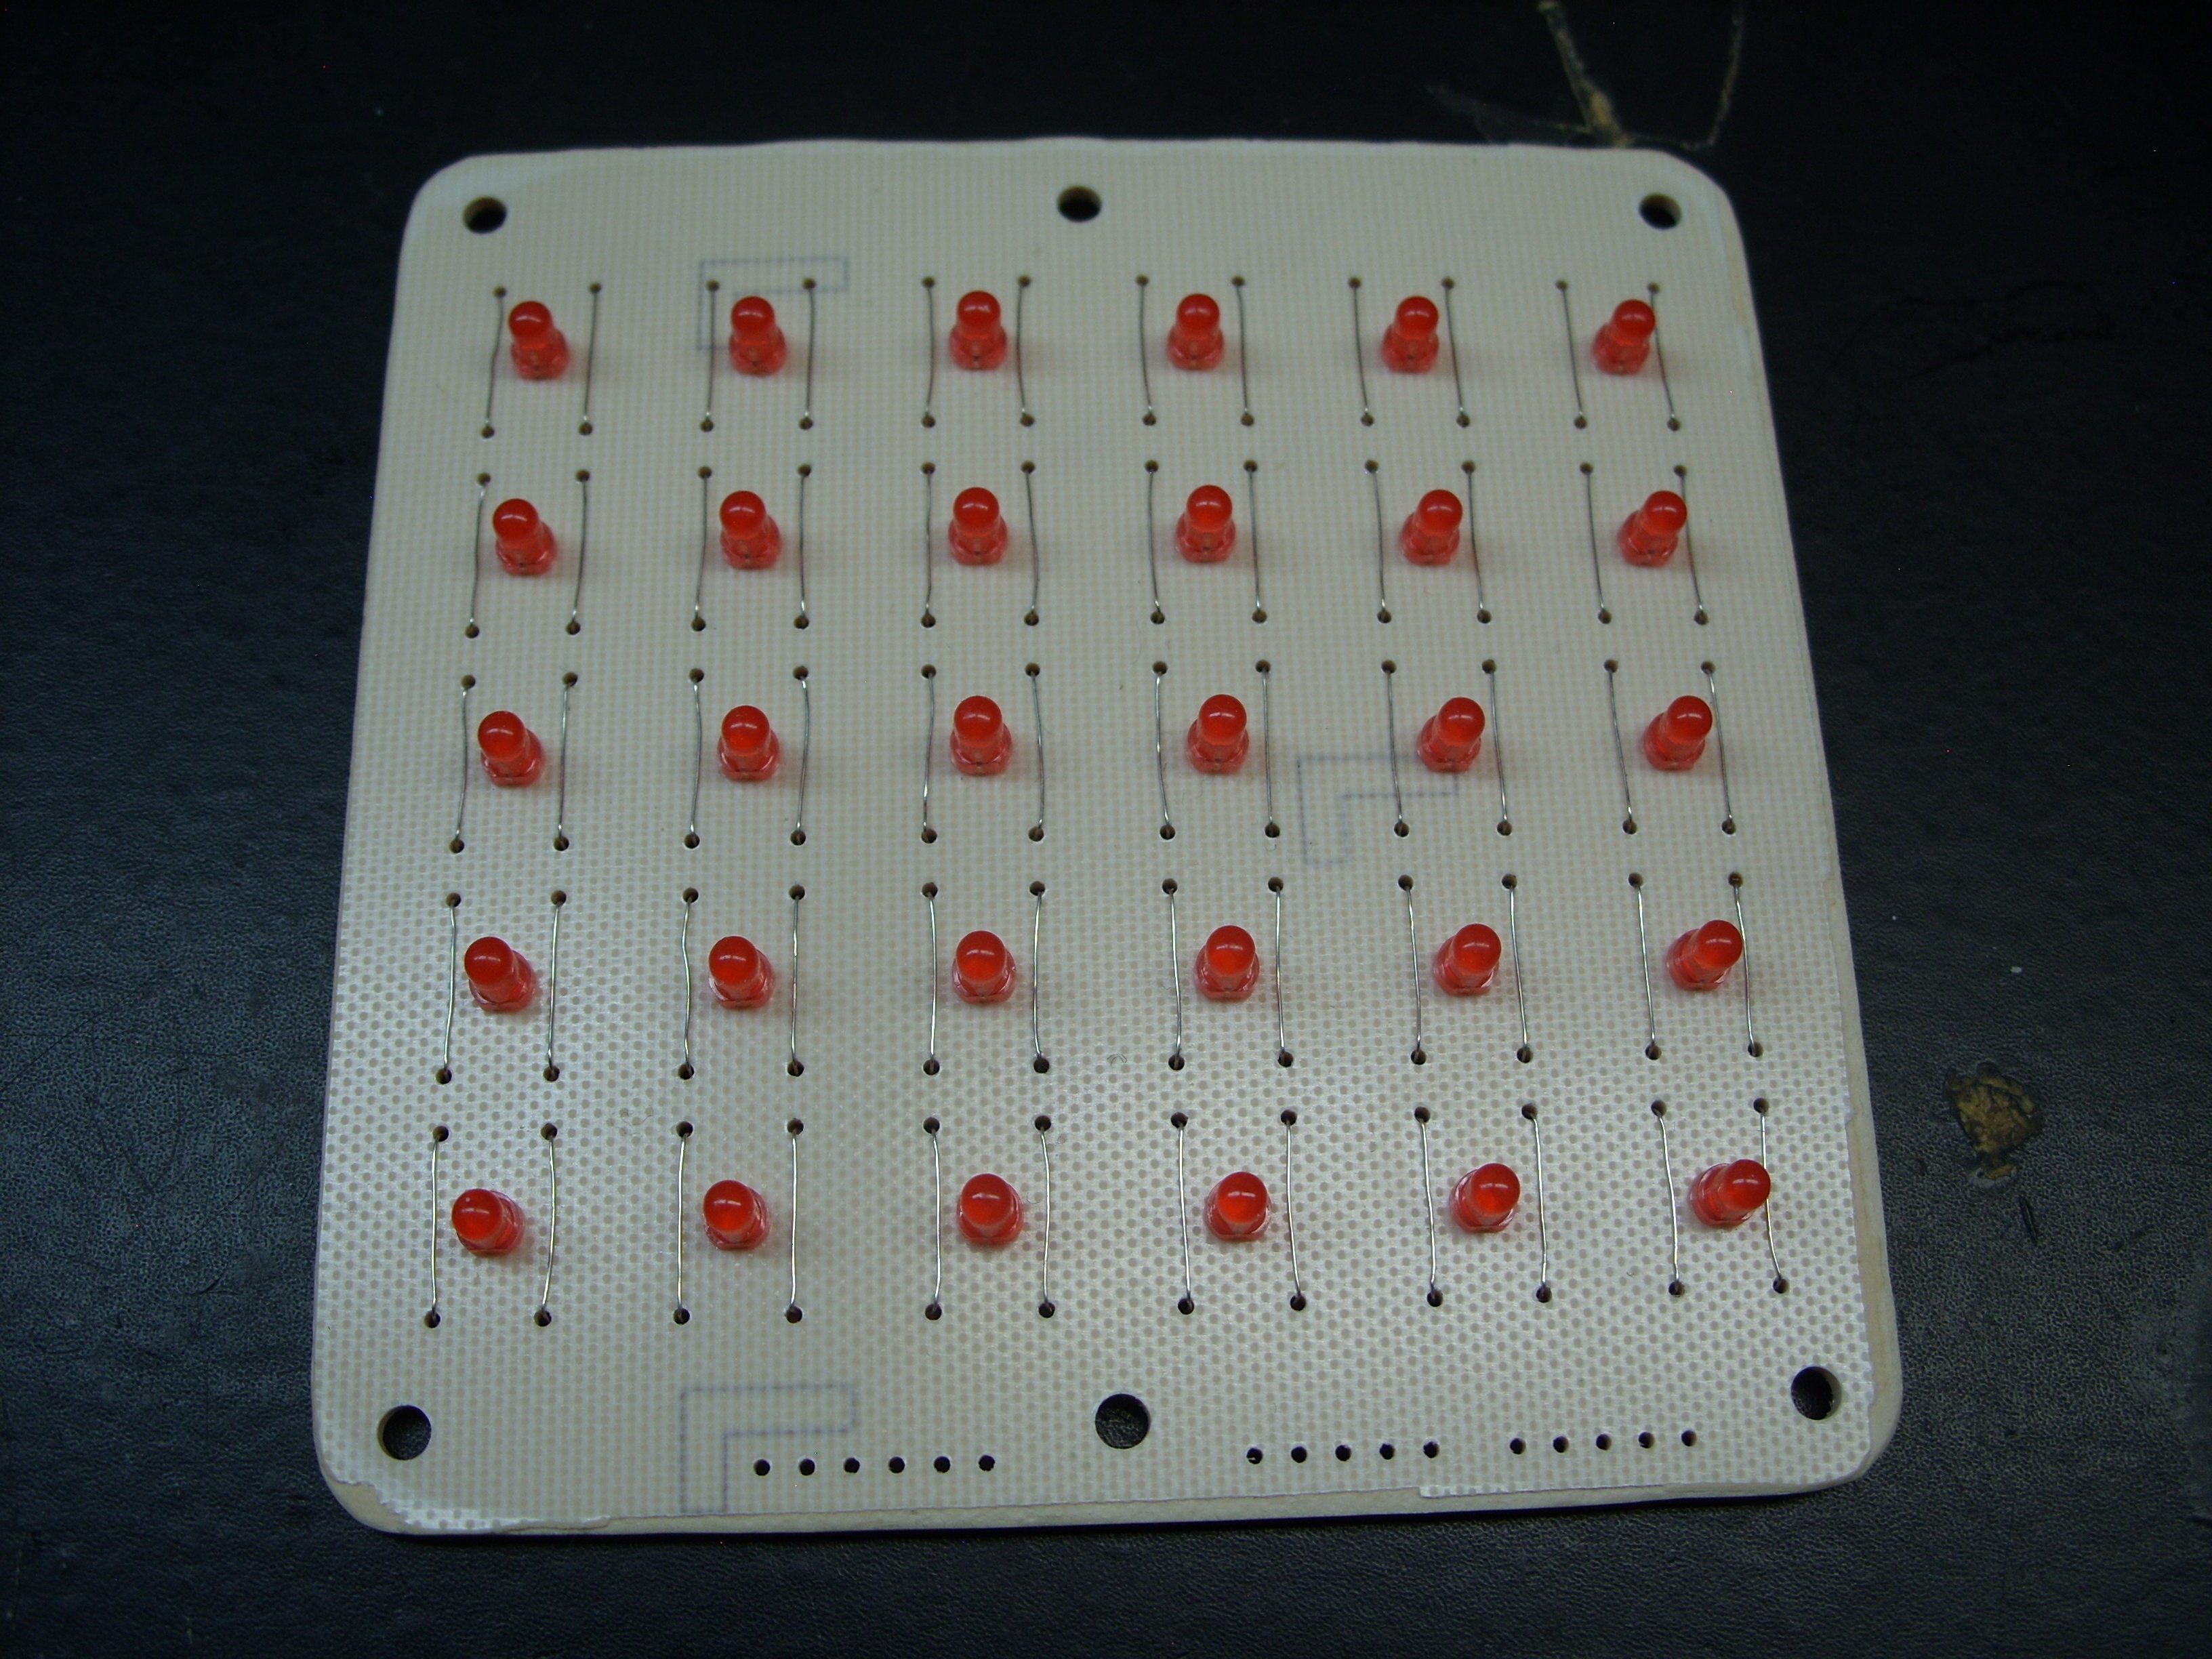
Anyway, I got the single-sided PCB material, and so now I have this attractive thing:
I also have this less-attractive underside.
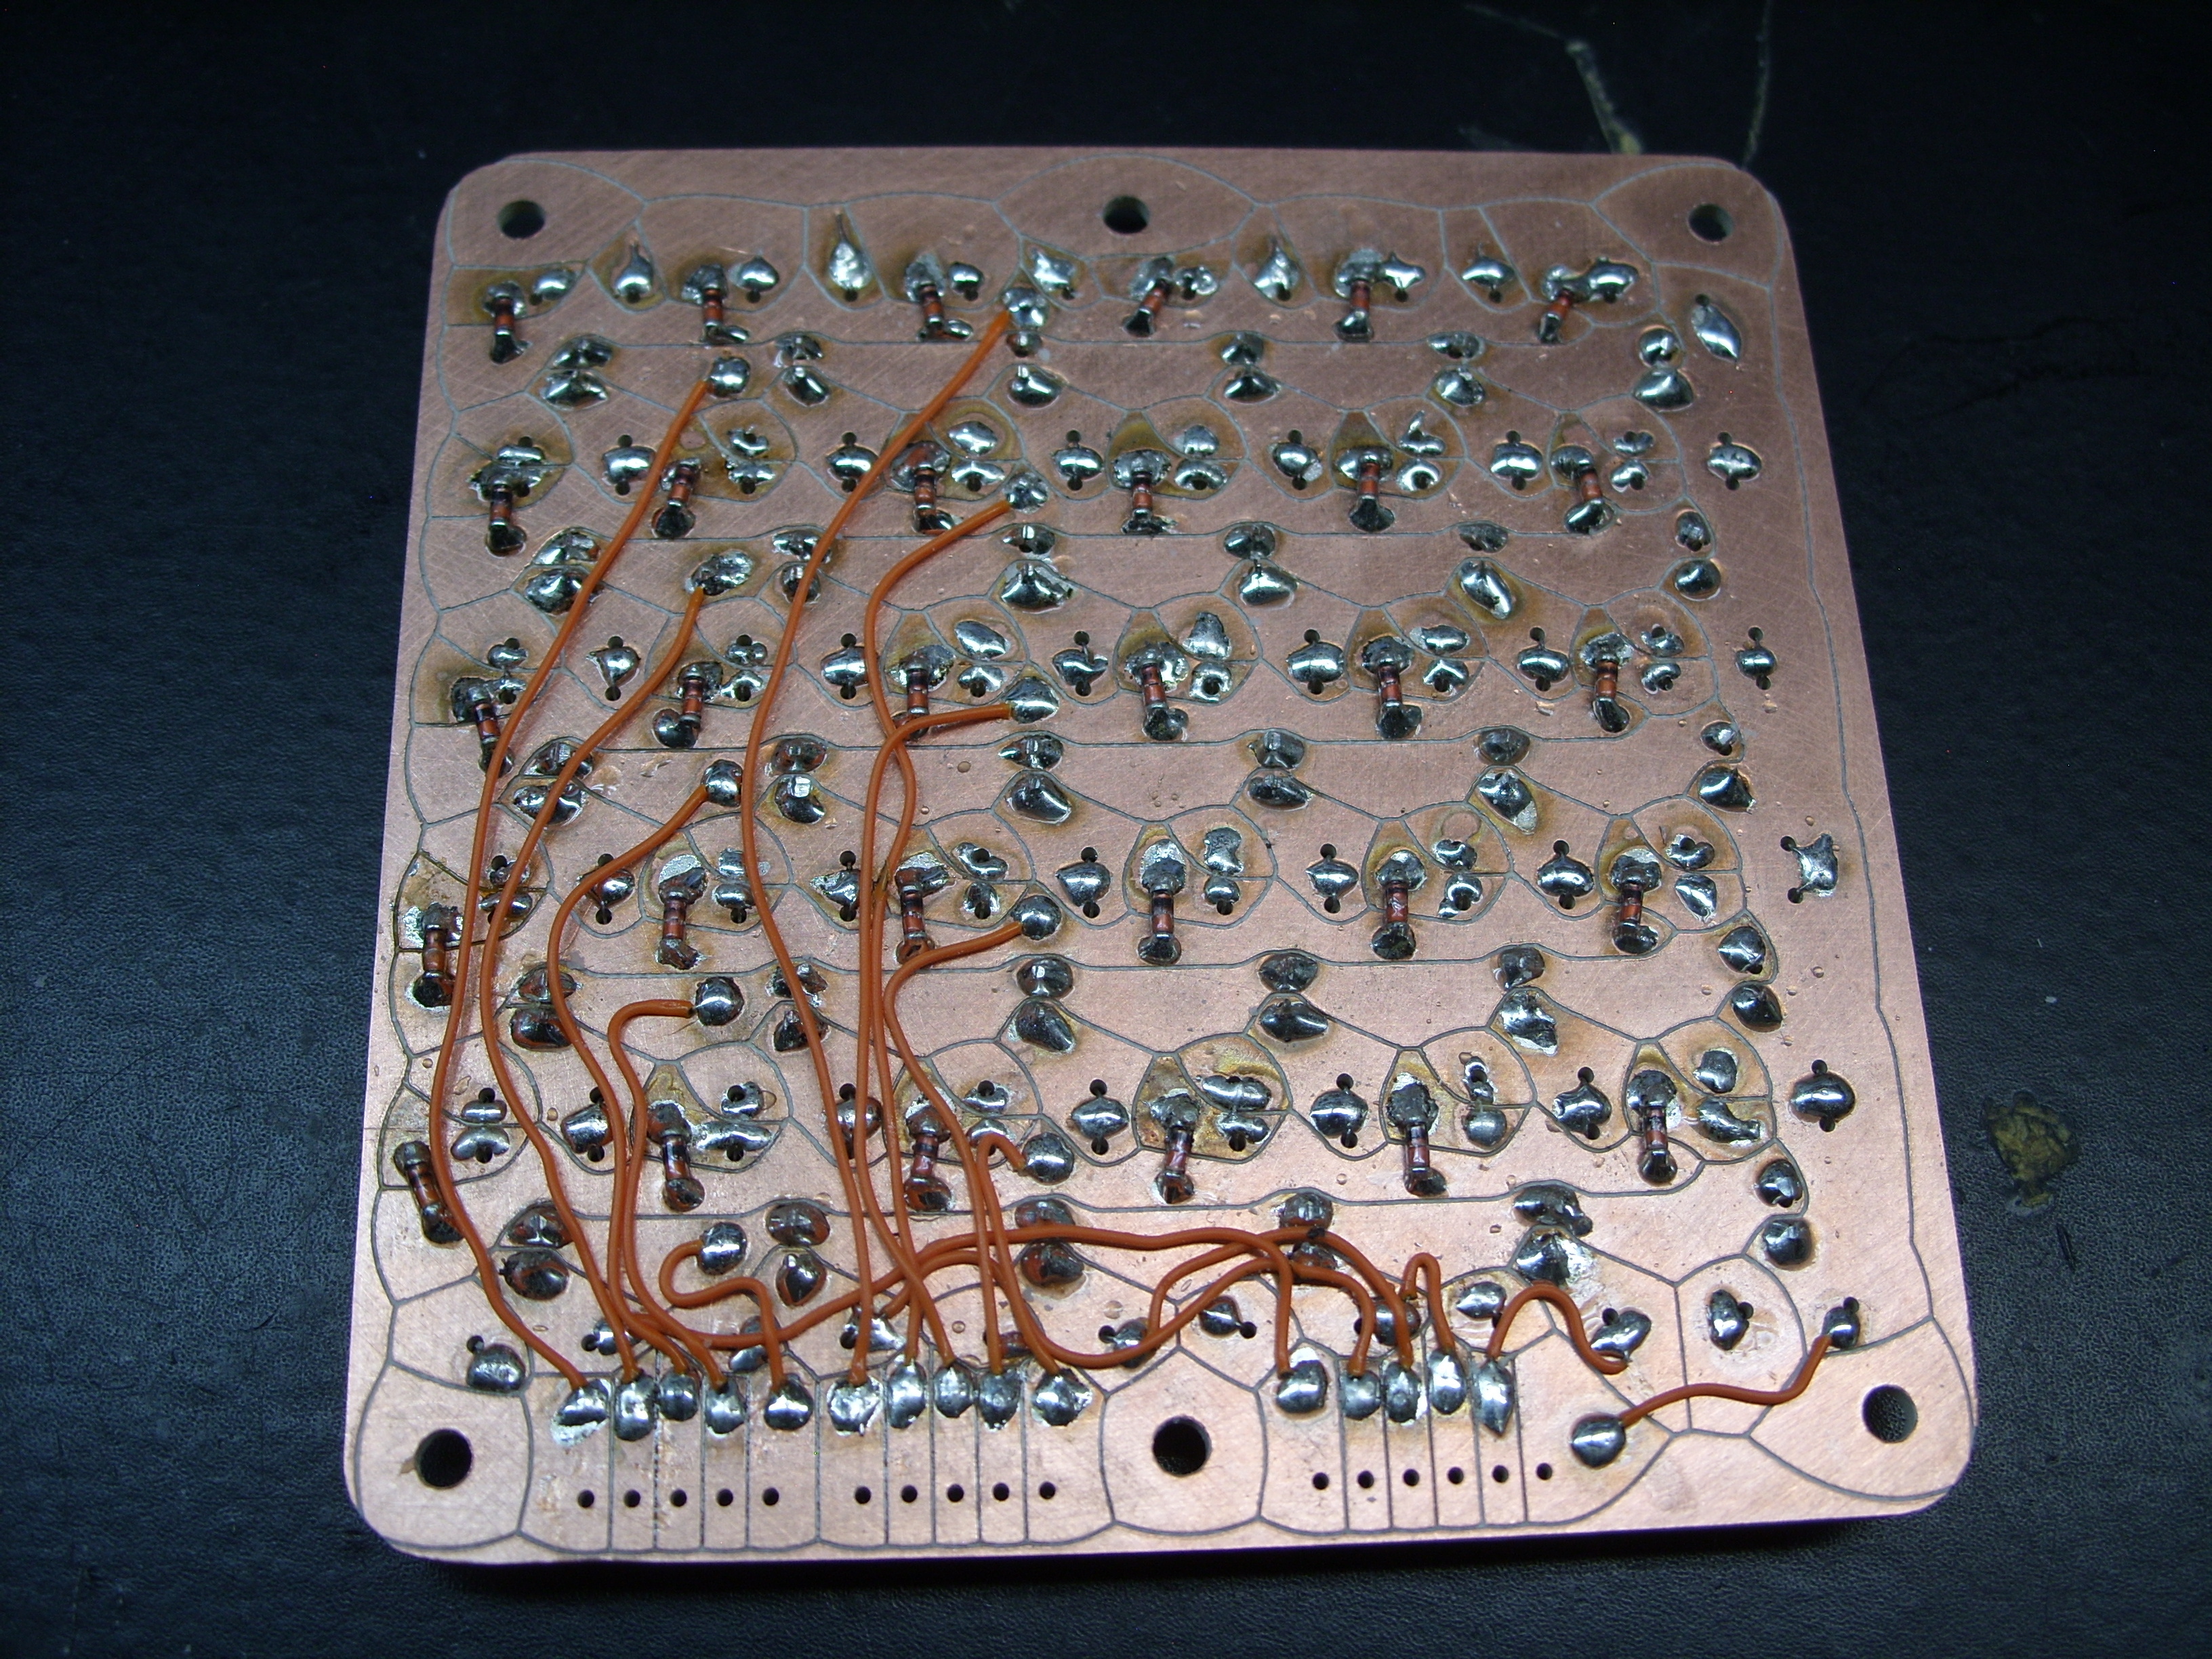
Unfortunately the whole thing is covered with holes for button contact wires and LEDs, none of which can move, and since I only have one layer and can't use jumper wires (except for the column wires for the button area) I didn't really have a choice but to put jumper wires on the bottom. I guess that's not really different from them being on the top but it looks kind of messy.
Also, while I know I saved a bit of time, it wasn't as much as I was hoping for. I still had to thread all of that wire through those holes, then solder the LEDs in place, then solder all of those surface mount diodes. So about the only effort this removed was that I don't have to manually twist the button contact wires together to hold them in place, nor do I have to use wrapping wire to manually form the LED and button rows. So it's easier but still requires a lot of work to make one.
Here's what all of the ones I've made before look like:
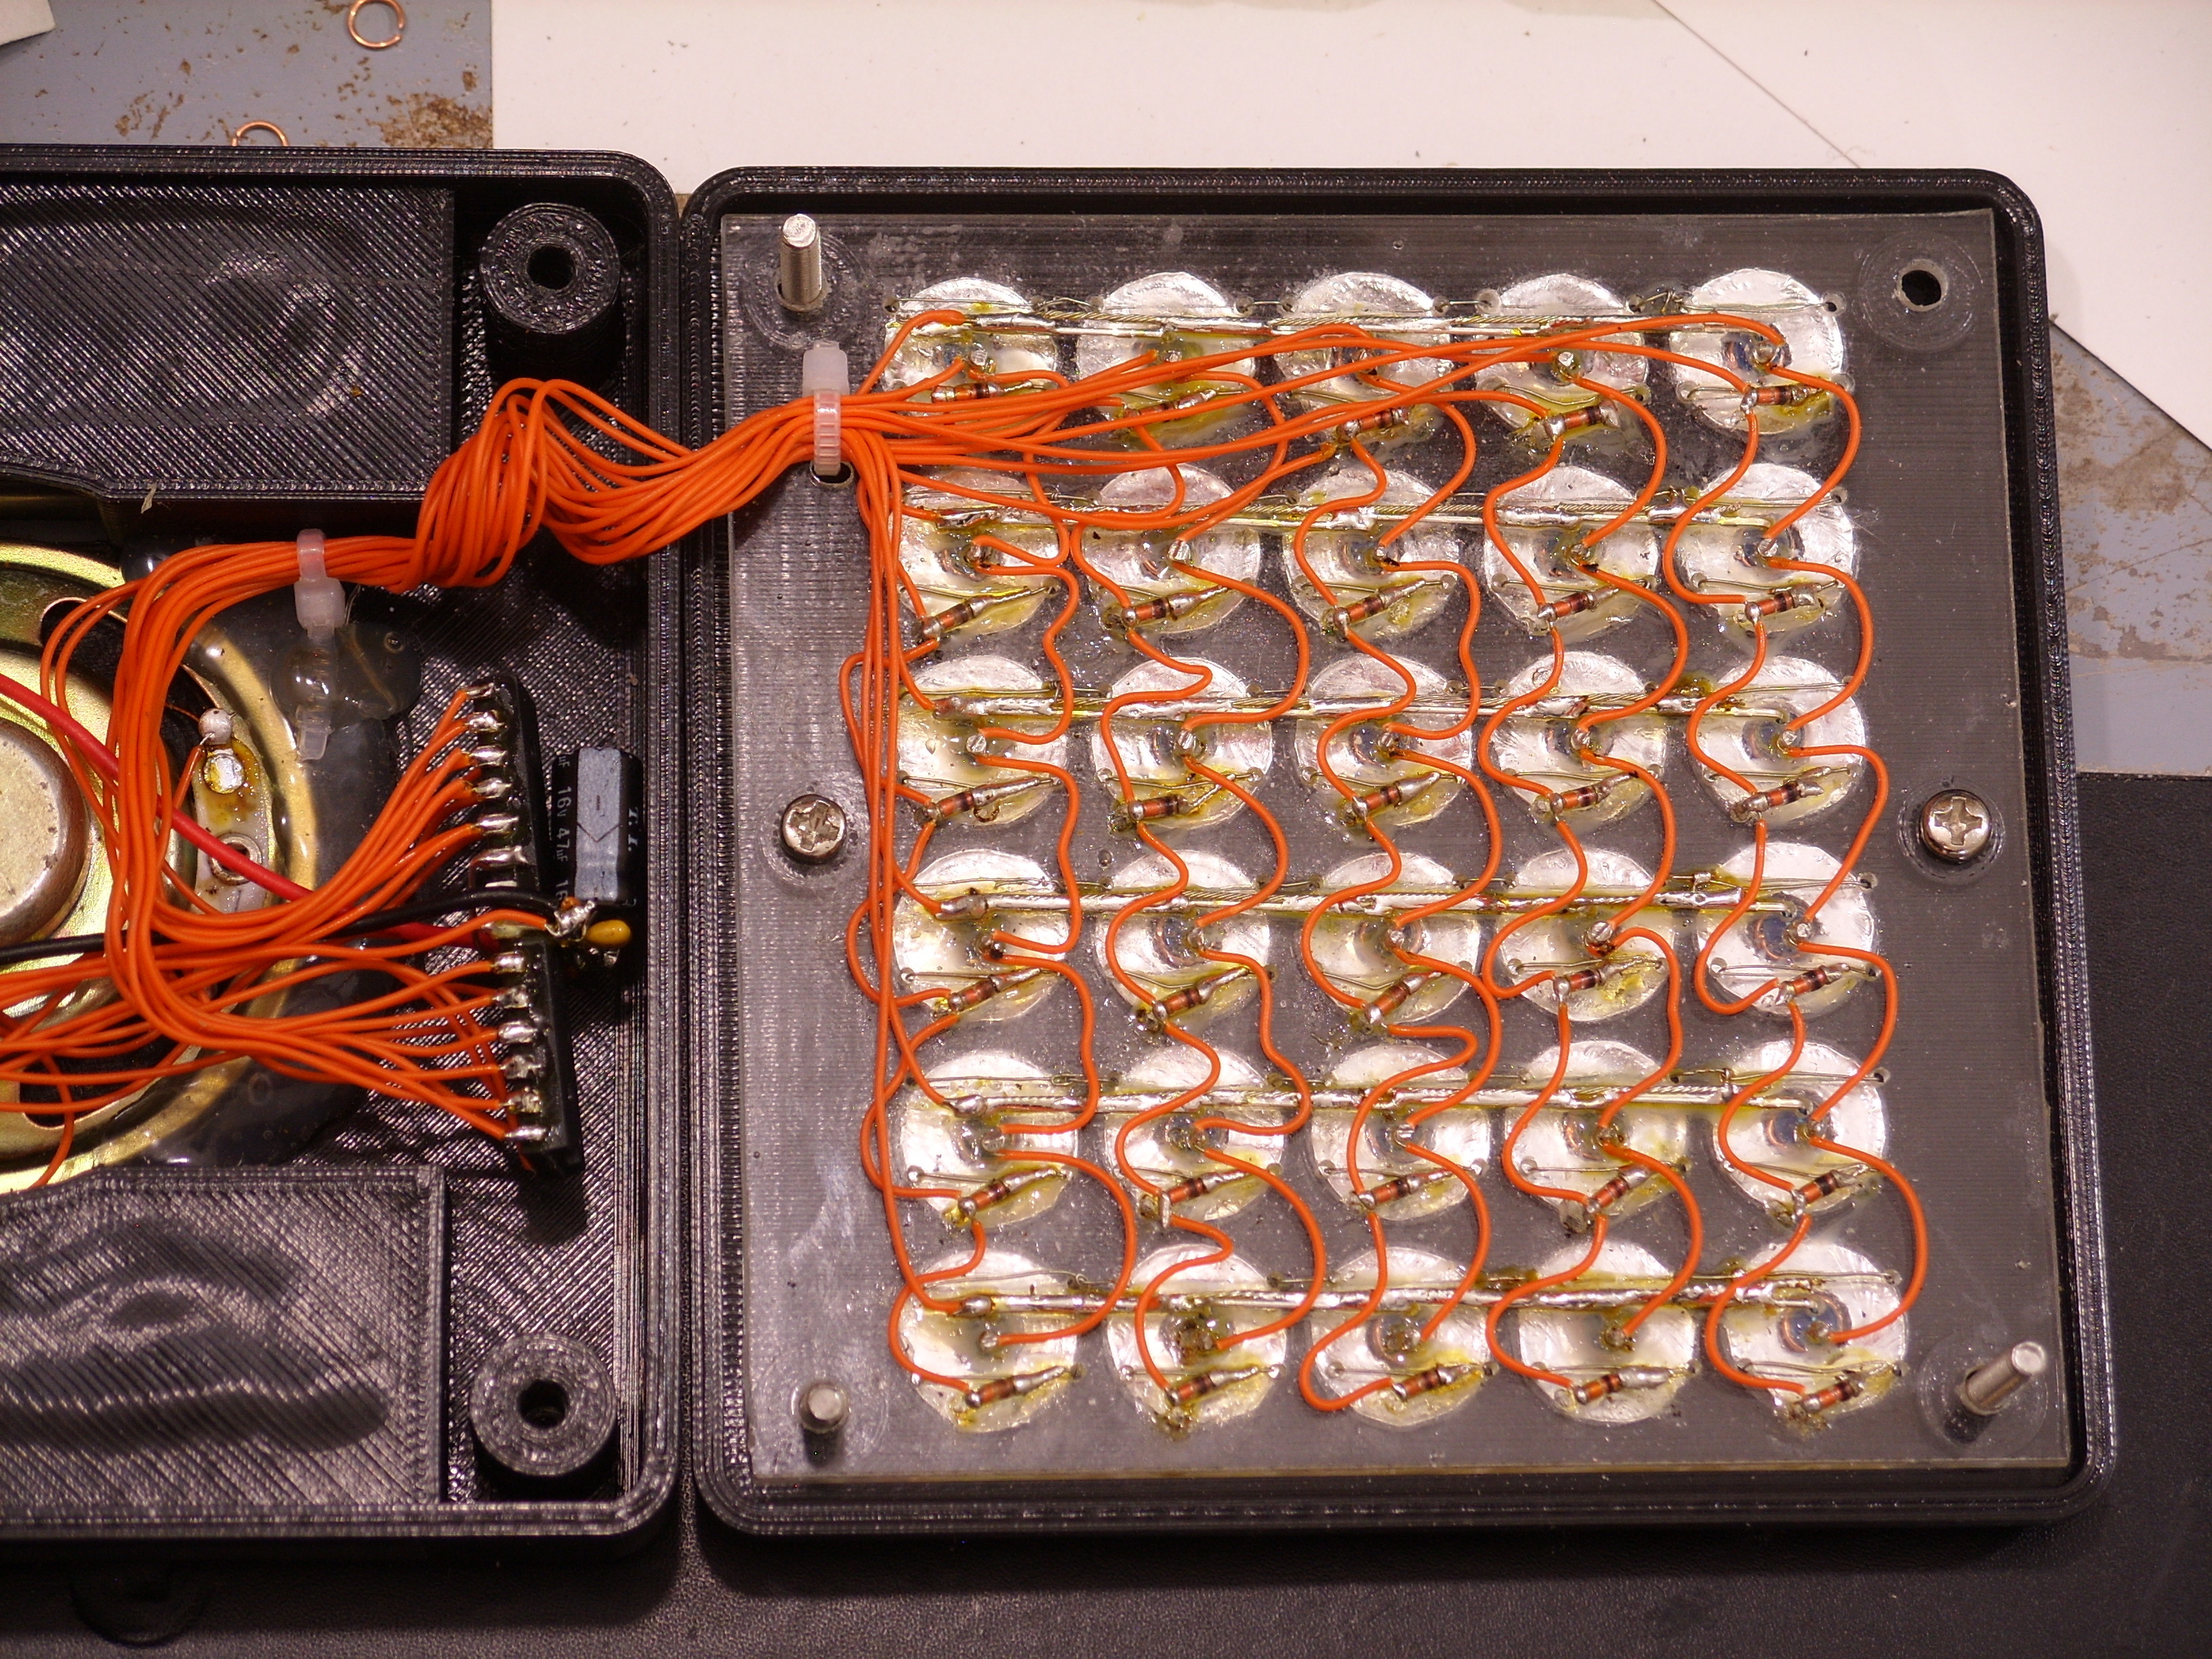
It's not apparent from the picture but the wires connecting the LED rows (which are vertical in this picture) all form small loops that wrap around each LED pin to improve the reliability, and they're one continuous piece of wire across the whole row and then down to the microcontroller. Making that piece of wire is a bit of work. The diodes are similar in that they have the loops but don't wrap around the diodes, as the loops make a larger surface for solder and thus also seem to improve reliability. So I guess the PCB is saving that effort, though also kind of replacing it with the effort of creating a PCB. I was expecting it to be more than a little easier with a PCB.
I probably just need to switch to silicone buttons if I want to do a lot to make it easier to make one of these, but I like having the LEDs in the buttons.